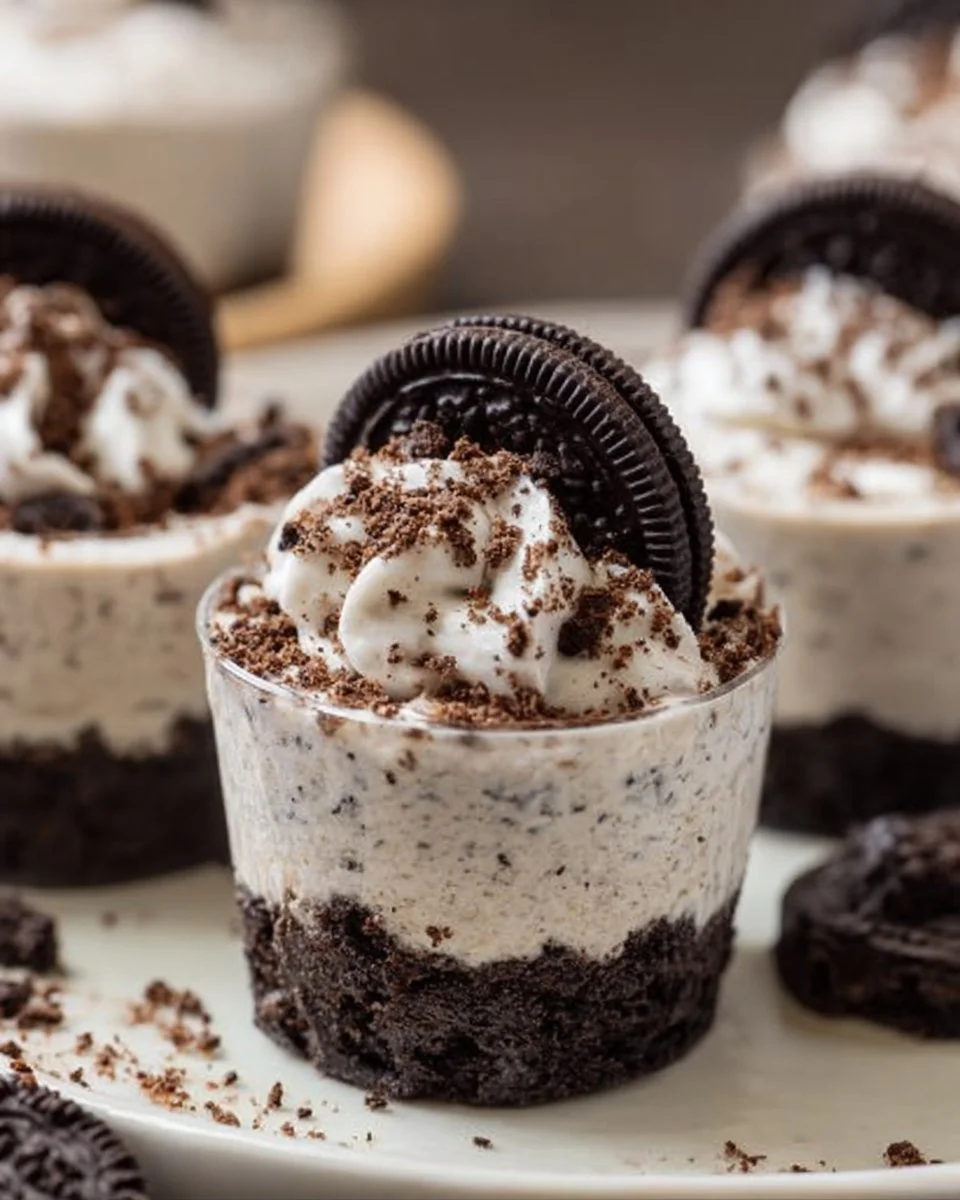
There’s something truly special about a dessert that requires no oven and still delivers a punch of delightful flavor. Imagine creamy cheesecake mingling with crunchy Oreo cookie bits, creating a sensational medley that’s just the right balance of indulgent and light. Each time I take a bite, it’s like an instant hug for my taste buds! I often whip these up for casual get-togethers with friends or even just as a sweet treat to celebrate the little moments in life.
What I love most about these Oreo No-Bake Cheesecake Cups is how quickly they come together. Seriously, you can have them prepped and chilling within half an hour—and I guarantee they’ll be the star of your dessert table! These cups are perfect for summer gatherings or as a fun surprise at family dinners. And if you somehow have any leftovers (which isn’t very likely), they taste just as divine the next day!
Why I Love Oreo No-Bake Cheesecake Cups
There’s a lightness to these cups that hits that sweet spot without feeling overly heavy. The combination of creamy cheesecake with those crunchy Oreo bits creates a texture that’s simply unbeatable. Plus, they’re incredibly easy and undeniably delicious—making them a true winner at my table. Whether you’re entertaining guests or treating yourself, these little cups feel fancy enough to impress anyone, yet simple enough for even a novice in the kitchen.
Oreo No-Bake Cheesecake Cups Ingredients
The magic of this recipe truly lies in the harmony of flavors and textures that come together to create pure bliss. Don’t worry about exact measurements just yet; those are all in the recipe card for you!
Core Ingredients and Their Roles
- 1 8 oz BLOCK OF CREAM CHEESE, SOFTENED: This is the rich, creamy base that gives our cheesecake its signature luscious texture.
- 1 8 oz COOL WHIP OR WHIPPED TOPPING: These fluffy clouds lighten up the mixture, making it airy and delightful.
- 2/3 CUP POWDERED SUGAR: This sweetness is what ties everything together, providing that perfect sugary note.
- 1 TSP VANILLA: A splash of vanilla enhances the flavor and adds a cozy warmth.
- 24-26 OREO COOKIES (MORE AS DESIRED): These are the stars! They provide that iconic crunch and chocolatey goodness that we all love.
Substitutions and Tips
Need a swap? If you want to tweak the ingredients, here are a few suggestions:
- You can use mascarpone cheese instead of cream cheese for an even richer taste—though it won’t be quite as tangy.
- Homemade whipped cream is a fantastic alternative to Cool Whip if you’re feeling ambitious or want a fresher touch.
- For a fun twist, toss in a splash of peppermint extract along with the vanilla for a festive version (think holiday gatherings!).
And here’s a practical tip: make sure your cream cheese is softened, as it’ll make mixing so much easier and ensure a creamy filling.
Kitchen Tools You’ll Need
- Mixing bowl (medium-sized)
- Hand mixer or standing mixer
- Plastic bag (for crushing Oreos)
- Rolling pin or sturdy wooden spoon
- 6 small dessert cups (at least 3/4 cup – 1 cup size)
- Spatula (for folding the mixture)
- Measuring cups

How to Make Oreo No-Bake Cheesecake Cups
Let’s dive into creating these effortlessly delicious Oreo No-Bake Cheesecake Cups. I’ve broken down the process into simple steps that are easy to follow and make it impossible to fail. Follow along, and you’ll have a delicious dessert everyone will adore in no time!
Prepare the Base
First, place the Oreos in a plastic bag and seal it tightly. Using a rolling pin or a sturdy wooden spoon, crush the Oreos into fine crumbs. You want to create a sandy texture—this step is key! Spoon about 1 1/2 – 2 tablespoons of the crushed Oreos into the bottom of your dessert cups and set them aside while we whip up our cheesecake filling.
Create the Creamy Filling
Next, in a mixing bowl, using a hand or standing mixer, whip together the softened cream cheese and powdered sugar until the mixture is creamy and smooth. It should look luscious and inviting! Add the vanilla and beat it in—this brings a beautiful aroma and flavor to our filling.
Fold in the Whipped Topping
Now, gently fold in the Cool Whip. You’re looking for a light and airy mixture here, so be kind with it—this helps maintain all that lovely fluffiness we love in cheesecakes! Once that’s incorporated, fold in the remaining crushed Oreos. (Those bits are where the deep flavor lives!)
Assemble the Cups
Now it’s time to bring it all together! Divide the cheesecake filling evenly across your prepared dessert cups, gently pressing it down onto the crushed Oreos to create that marvelous layer effect. Just think about the creamy goodness paired with the crunch waiting for you!
Chill and Set
Finally, cover the cups with plastic wrap and chill in the refrigerator for about 1 hour or until you’re ready to serve. This allows the flavors to meld together beautifully.
Top with Whipped Cream and Enjoy!
Once chilled, it’s time to dress your cups! Top each one with a dollop of whipped cream and add a sprinkle of crushed Oreos on top. A beautiful presentation that’s bound to impress!
How to Store Oreo No-Bake Cheesecake Cups
These delightful cups maintain their quality beautifully! If you have any leftovers (which, let’s be honest, is a rare event), store them in the refrigerator in an airtight container for about 3 to 4 days. You can also freeze them for long-term storage—just pop them in the freezer for up to 2-3 months. When you’re ready to enjoy, simply thaw them out in the fridge overnight.
Tips for Success
- Soften cream cheese well—this prevents lumps in your filling.
- Be gentle when folding your whipped topping; you want to keep that airy texture!
- Don’t skimp on chilling time—this helps the filling set properly.
- Use a spatula for a nice, even distribution of cheesecake filling across the cups.
- Experiment with different cookie types for unique flavors!
Serving Suggestions
- Pair with fresh strawberries or raspberries on the side for a fruity kick.
- Drizzle with chocolate or caramel sauce for an extra indulgent touch.
- Enjoy with a cup of coffee or tea for a delightful after-dinner treat.
- Add a mint leaf on top for a refreshing garnish.
- Present them on a beautiful platter to showcase their irresistible charm!
Each spoonful of these Oreo No-Bake Cheesecake Cups is a moment of bliss. Treat yourself and your loved ones to this charming dessert—you’ll be glad you did!